Quantcast
Channel: Bakericious
Viewing all 334 articles
Browse latest View live

Peanut Butter Muffin

$
0
0


I always like peanut butter, be it to spread with bread or in any form of baking. I had used peanut butter to bake peanut butter chocolate chips cookie cake and peanut butter biscuits, both turned out so delicious and irresistible. Ever since I saw this recipe at 孟老师的100道小蛋糕, I set my mind that I need to try it out soon.


Recipe from 孟老师的100道小蛋糕.

Ingredients : 8 big muffin cups
3 eggs
50g castor sugar
75g oil
200g crunchy peanut butter
90g milk
150g cake flour
1 tsp baking powder

Method :
1. Whisk together the eggs and sugar until well combined.
2.  Add in oil and mix well.
3. Add in peanut butter and milk, continue to beat until in liquid form.
4. Fold in the dry ingredients, use spatula to fold the batter in different direction until well combined.
5. Scoop the batter in to the muffin paper liners to about 3/4 full.
6. Bake in the preheated oven 180C for 25 minutes or till the tester comes out clean.


Verdict?
The muffin is full of peanut butter aroma, tasted quite nice when is hot but I still prefer cakey texture kind of muffin.

Tri Colors Butter Cake

$
0
0


I am not sure is it many people like me, cannot resist colorful bakes. I really love bakes with many colors, cannot take my eyes of it lol. Yes, I do understanding too much coloring is not good for our body so I didn't do it frequent. I reckon once for a while to indulge my eyes with such beautiful bakes should be alright :P. Perhaps I should explore in using natural coloring so that I can make more rainbow cakes heeheehee...


This recipe was bookmarked long time ago but I have not got a chance to bake it, too many recipes with so little time lol. I was craving for butter cake so decided I must try this recipe.However I do not want an usual butter cake so I added in some coloring and dust with cocoa powder in between the layers.


Recipe adapted from Do What I Like.

Ingredients:
225g golden churn butter (I used other brand since I wanna clear stock)
1 1/2 tbsp corn oil / olive oil (I used olive oil)
165g sugar
1/3 tsp salt
1 tsp vanilla extract
5 small eggs

210g cake flour
60g corn starch
1/2 tsp baking powder

3 - 5 tbsp whipping cream / milk (I used 4 tbsp milk)

3 different coloring
Some cocoa powder

Method:
1. Mix cake flour, corn starch and baking powder together. Sieve twice into a large mixing bowl.
2. Cream butter, oil, sugar, vanilla and salt till pale and fluffy.
3. Beat in eggs one at time, beat well after each addition.
4. Add in the flour mixture and mix at low speed till well blended. (I used hand to fold)
5. Stir in the whipping cream or milk.
5. Divide the batter into 3 portions, stir in each color into each portion and mix well.
6. Pour one portion of batter into a lined pan, dust some cocoa powder on top and cover the batter.
7. Pour another portion of batter on top and dust some cocoa powder on top and cover the batter.
8. Pour the last portion of batter on top and level and bake at 180C for 35 - 45 minutes or till cooked. (I baked 35 mins still not totally done yet but over baked for additional 10 mins so 40 mins should be the right baking time.)

Notes:
After 10 - 12 minutes in the oven, remove it and make a length-wise cut on the surface of the batter with a knife so that the cake will "explode" nicely with a neat line in the middle. (I didn't do it cos I missed out this part)

For best result use golden churn butter and whipping cream.

Verdict?
As I have over baked the cake so it tasted a bit dry, however I still think the cake tasted good, at least I finished one thick slice of cake and still wanted to have another slice. The sweetness of cake is just nice, it will taste a bit bitter when bite into the chocolate lining. So for people who prefer more sweet or have sweet tooth, must increase the amount of sugar.

Apple Cranberry Olive Oil Cake

$
0
0


I dun usually consume dried fruits so I will not purchase it except for raisins which I will keep some stock for cake making purpose (I love making rum and raisins cheesecake).

 I had a very yummy salad during the Xmas lunch and one of the ingredient used was dried cranberry (craisins), the sourish sweetness of craisins had added so much marks to the salad. I went to purchase a box of craisins thinking that I can snack it between my meals, however I only snack once and the box is remain untouched for a few months lol.


When I saw this from Small Small Baker, I immediately bookmarked it. Since I have a few apples in the fridge and a box of craisins for me to clear stock, and this recipe sound hassle free that won't take up much of my time so I went ahead with it.


I have not participated in Aspiring Bakers for such a long long time, since I have this cake using olive oil and loaded with lots of fruits, surely more healthy that is helped to lighten our waistline a bit.

I am submitting this post to Aspiring Bakers # 22 : Lightened Up Cakes (August 2012) hosted by Qi Ting of A Dessert Diet.

Recipe adapted from Small Small Baker.

Ingredients : makes one 6 inch round tin
70g sugar
80ml olive oil
2 small eggs
2 medium size red apples, peeled, cored and diced
130g plain flour
1/2 tsp baking powder and slightly more
1/4 tsp baking soda and slightly more
1/4 teaspoon of salt and slightly more
50g dried cranberries (I soak in water for a few minutes to soften, then pat dry)
1/2 tsp cinnamon powder

Method
1. In a large mixing bowl, add in sugar, olive oil and eggs. Whisk the mixture with a hand whisk until sugar dissolves and well-mixed.
2. Add in apples. Mix well.
3. Add in sifted flour, baking powder, baking soda and salt. Add in dried cranberries and cinnamon powder. Mix well with a spatula. Do not overmix.
4. Pour the mixture into a lined and greased 6 inch cake tin.
5. Bake at preheated oven at 175 deg C for 30 minutes or until done. Poke a skewer into the middle of the cake. If it comes out clean, it's done. If not, give it another 5 to 10 minutes.

Verdict?
This cake is so easy to bake and delicious. I love the bites on apples and cranberries and feel no guilty when eating more since using olive oil lol. However I felt that the cinnamon taste is not strong enough, I will increase to 1 tsp at least if I am going to bake again.

Cocopandan Cake

$
0
0

I like all sorts of pandan cake, be it pandan chiffon or pandan butter cake. When I spotted this cocopandan cake from Table for 2 or more, there is no doubt at all for me to bake one since I cannot resist pandan cake.

As usually, I didn't bake it immediately, it took me more than a year before I finally have chance to make it happened lol.


Initially I thought of using coconut milk to replace the evaporated milk but finally decided to follow exactly from the recipe to try the original taste.


Recipe from here.

Ingredients : for 8" square cake pan
(A)
300g self raising flour, sifted
3/4 cup dessicated coconut
185ml concentrated pandan juice *
185ml evaporated milk
200g butter
150g sugar
4 egg yolks (small)

(B)
4 egg whites (small)
3/4 tsp cream of tartar
75g sugar

* I used 8 pandan leaves and blend with water, left the juice in the fridge for 3 days to get the concentrated pandan juice. The total amount of thick layer of pandan extract and the upper layer of diluted pandan juice added up to be 185ml.

Method :
1. Preheat oven at 160C. Line and grease the cake pan.
2. Combine milk with pandan juice and set a side.
3. Beat (B) until stiff peaks form and set aside.
4. With the same beaters, beat butter and sugar until light and fluffy.  Add in egg yolks, one at a time, beating well and scrape the bowl after each addition.
5. Put in 1/2 portion of step 2 and beat until well combined. Put in 1/2 portion of flour and mix.
6. Put in balance of step 2 and mix, fold in the balance of flour and mix well.
7. Add in dessicated coconut and mix well.
8. Fold in beaten egg whites in additions.
9. Pour batter into the prepared pan and bake for about 50 mins or until the skewer comes out clean.

Verdict?
The outer layer of the cake is a bit hard, I must have over baked the cake. The inner texture of the cake is soft and moist with the bites of dessicated coconut really delicious. The sweetness is alright for me but the sugar still can be increased a bit e.g. another 10g. Next time, I am going to try it again by using coconut milk instead.

Cheddar Cheese Butter Cake

$
0
0

This cake was baked long time ago, so I took sometimes to trace out the recipe that I had used.


Recipe taken from here.

Ingredients : 2 x 8"x3"x3.5"
250g butter
140g castor sugar
5 eggs
30g milk (I added in)
1.5 tsp baking powder
250g plain flour
150g cheddar cheese, shredded 
adequate cheddar cheese, shredded for topping

Method:
1. Cream butter and sugar till light and fluffy.
2. Add eggs one at a time and mix well.
3. Fold in sifted flour and baking powder until well combine.
4. Add in shredded cheddar cheese and mix well.
5. Pour into a loaf pan and sprinkle some cheddar cheese on top.
6. Bake at 180C for 45mins. (I baked for 30 mins)


Verdict?
The cake is very fragrant with savory sweet taste but I think the texture is a bit dry for me even though I had added milk. Although the cheddar cheese topping has made a nice looking top for the cake but it tasted a little hard.


Steamed Moist Chocolate Cake

$
0
0


Recently I have "craving" on baking, in fact I am not too sure I have that craving is it because I wanted to bake, or is it because I wanted to take photos on my bakes, hope you understand what I meant lol. I am trying to learn to use dear husband's DSLR, exploring on the camera setting to improve my photography skill, so that I can present nicer photos on my bakes to share with you :D. 


Perhaps both are the reasons that pushing me to bake every weekend (if time permit of course). As I am starting to watch my diet, I dun really eat my bakes recently. I will normally have a small slice so that I can provide some feedback on the bakes. The bakes will go to the stomach of my family and friends, luckily so far all of them are still very much enjoy my bakes and of course, welcome my bakes lol.


Well back to this steamed moist chocolate cake which I saw it at Jane's Corner and Min's blog. It has never come across my mind to touch steam cake, I dun really fancy those traditional steam sponge cake. So to me, steamed cake taste the same which is not my cup of tea. However the raves from Jane and Min making me to bookmark this recipe, just in case one day I may change my mind.

True enough, after a year plus, when I flipped through my baking list looking for chocolate cake that easy to whip up, I spotted this recipe a again. There is no need of waiting for the butter to soften, no need of mixer, just one pot can settle the cake. So without hesitation, I took action on it immediately.


Guess what, such easy cake I was still able to make mistake. When I folded the flour into the batter, I was thinking how come the batter is yellowish color, it supposed to be chocolate cake rite? Then I realised that I totally forgot about the cocoa powder!!! Oh no, I was so blurred! Quickly mixed in the cocoa powder, thinking not sure will the cake turned out to be dense due to my double folding.....

Mine is the healthier version since I used cooking oil rather than butter, I reduced the sugar as well. The sweetness is just nice for me, you may need to increase the sugar if you have sweet tooth.

I am submitting this post to Aspiring Bakers # 22 : Lightened Up Cakes (August 2012) hosted by Qi Ting of A Dessert Diet.


Recipe adapted from Cooking Crave.
 
For Cake :
Ingredients :
180 g butter (I replaced by sunflower oil)
200 g caster sugar (I reduced to 180g)
200 g full cream evaporated milk (I used low fat)
2 eggs, slightly beaten with fork
100 g plain flour
50 g cocoa powder
1/2 tsp baking powder
1/2 tsp baking soda
1/2 tsp vanilla extract or 1 tsp vanilla essense
2 tbsp of rum(optional)

Methods :
1. Combine caster sugar, evaporated milk, vanilla extract or essense and butter in a saucepan.Stir over low heat until sugar is dissolved and butter is melted, turn off the fire and keep warm.
2. Add the beaten eggs into the slightly cold evaporated milk mixture and stir till well mix.
3. Sift the flour, cocoa powder, baking powder and baking soda into a large mixing bowl, then pour the eggs mixture over the flour and stir till well mix (cake batter should be runny - mine is like the batter for brownie)
4. Heat up the steamer.
5. Lined and greased a 8 or 9 inch round baking pan. (I used 8")
6. Pour the batter into the lined pan and place the pan into the steamer and cover the top of the pan loosely with a piece of aluminium foil.
7. Cover the steamer and steam over medium heat for 45 mins. (I steamed for nearly 55 mins, until skewer came out clean)
8. Cool the cake in pan before turning out for further decoration. 

For Frosting :
100g chocolate, chopped into small pieces
25g milk

Method :
1. Double boil the chocolate and milk until chocolate is melt.
2. Pour onto the cake and chill the cake.

* This amount of chocolate ganache is not sufficient to coat the whole cake, you need to increase the amount of chocolate if you want to frost the entire cake.

Verdict?
The cake is moist and soft and chocolaty, the rum given a special fragrance to the cake and making the cake so delicious. My friends given double thumbs up on this cake, they love it a lot. You may serve the cake when is chilled or in room temperature. We love to heat it up a bit for the melted chocolate coating to go with the rummy chocolaty cake, heavenly! No wonder Tin Tin given 5 stars rating for this cake, how true it is. This cake has totally changed my concept on steam cake. This is definitely a keeper, a cake that I will always come back if I need a yummy and fuss free chocolate cake.

Temptation Oreo - Baked Oreo Cheesecake

$
0
0


I still have a few baking that done long time ago that need to "get rid" fast. This is one of them, which was baked for dear brother birthday which birthday fall at the same day as dear daughter. I baked it together with the angry birthday cake since they were celebrating together.


I was so stress since I had stopped baking for nearly a year. With a super active new born that needed to breast feed once 2 hourly, I really had hard time to squeeze out my limited free time to do the baking. Luckily everything went well, phew... the birthday boy was so happy to receive the cake. Guess he miss his sis baking so much lol.


I reduced the ingredients to bake a 7" cake but actually the amount can fit into 8" nicely, 7" will yield tall cake that require longer time to bake.

Recipe adapted from Fantastic Cheesecake by Alex Goh

Biscuit Base :
100g Oreo Cookies (minus the creme), crushed

30g unsalted butter

Filling : for 7" or 8" round cake pan
660g cream cheese
115g sugar
1/2 tsp vanilla extract
3 eggs
175g whipping cream
12 pcs oreo cookies, quartered

50g chocolate, melted

Method :
1. Press the biscuit base onto the bottom of the springform cake tin. Bake ar 160C for 10 mins and set aside to cool.
2. Cream sugar and cream cheese until smooth. Add vanilla extra and mix until well blended.
3. Add eggs one at a time and cream until smooth.
4. Add whipping cream and cream until well combined.
5. Add oreo cookies and stir until well mixed.
6. Pour the cheese filling into the prepared biscuit base.
7. Bake at 160C for 50 mins or until centre is almost set. Turn off the oven and leave the cake cool in the oven with the door slightly open for 1 hr. (I baked for 1 hr and 10 mins)
8. Run a small knife around the rim of the cake pan to loosen the cake. Set aside to cool.
9. Cover the cake and refrigerate for 5 hours or overnight.
10. Unmould the cake. Pour some chocolate ganache in the center of the cake.
11. Refrigerate it for 2 hours and let the chocolate ganache set.


Verdict?
The cake is so rich and creamy, oreo taste great in any bake, definitely a keeper for cheese lovers.

Mixed Fruit Coconut Cake

$
0
0

This cake was baked such long time ago that I nearly forgot about it. When M went back to Taiwan for CNY, she asked me what I want her to get for me. There are a lot my dear friend but the most I wanted are baking books lol. So I ordered online and delivered to her mum's house and she helped me to lug back to Spore. So to thank her mum for "lending" out her address and also helping me to receive the books, I baked this cake for her.


As she need to bring the cake on board so I need to make one that easy to hand carry. So much of consideration, I decided to use this coconut cupcake recipe that I love it a lot.

Recipe adapted from here.

Ingredients : for 7" round cake pan & 3 cupcakes
200g butter (soften)
120g caster sugar
4 eggs
6 tbsp coconut milk
200g cake flour
2 tsp baking powder
100g coconut powder
50g desiccated coconut
100g mixed peel and raisins
some dessicated coconut (to drizzle on the cake)

Method :
1. Beat butter and caster sugar until light and fluffy
2. Add in egg, one at a time, beating thoroughly after each addition.
4. Add in milk and mix well.
5. Fold in sifted flour, coconut powder using spactula.
6. Add in dessicated coconut, mixed fruit and mix well.
7. Pour the batter into the cake pan and bake in pre-heated oven at 150C for 35-45 mins.

Avocado Milk Pound Cake

$
0
0

Avocado is a kind of fruit that I have never purchase before until my little started on his semi solid. Although I do enjoy those sushi that wrapped with avocado but I never think of buying it and eat. Now avocado is one of the fruits that is in my regular shopping list, to purchase for my little kicker due to the great health benefits. 

Since I have one avocado left in the fridge, so I decided to make something with it. I went blog hopping and saw this avocado milk pound cake and decided to give it a try. I adjusted the amount of the ingredients since I had only one  avocado to bake the cake.


Recipe from Table for Two or More.


Ingredient : (for 8" x 3.5" x 3” loaf pan)
77g butter
33g sugar
80gm avocado flesh (used 1 avocado)
3/4 tbsp lemon juice
100g condensed milk
135 cake flour
165g all purpose flour
2/3 tsp baking powder
1/8 tsp baking soda
2 small eggs

Method
1. Combine avocado flesh with lemon juice and mash until fine. Pass it through a sieve. Set aside.
2. Sift cake flour, all purpose, baking powder and baking soda together. Set aside.
3. Cream butter and sugar until pale and fluffy. Beat in eggs, one by one, beating well after each addition.
4. Beat in condensed milk until well incorporated. Put half the sifted flour in and mix on low speed. 
5. Add the balance of flour. When everything is smooth, on low speed beat in avocado puree.
6. Pour batter into a lined loaf pan and bake in preheated oven for 35mins or until done.

Verdict?
My cake did not come out good, the texture is a bit dry, probably I had either over mix or over bake the cake. As for the taste wise, I dun really can tell it is avocado flavour, the taste is actually quite neutral. 

Lemon Bars

$
0
0


When I saw this lemon bars in here, I was attracted immediately by the color of the lemon filling. The color was so bright and radiant that I wanted to bite into it lol.

Everything went smooth until I started to pour the lemon topping onto the biscuit base. As I was using removable cake pan, the topping actually leak out from the side of removable base and made a mess all over the place. I almost gave up since the topping left only less than half but I decided to proceed with the baking for the sake for going through the process lol. Luckily I did, the outcome actually surprised me. Although the look is not attractive as Evan's but it actually didn't speak justice for the taste.


Recipe from Evan's Kitchen Rambling.

Ingredients:
For the crust :
113.4g butter
55g granulated sugar (I reduced to 45g)
3/4 tsp vanilla extract
1/8 tsp salt
110g all-purpose flour

For the lemon topping :
225g sugar  (I used 180g)
3 tbsp all-purpose flour
3 large eggs
1/2 tsp finely grated lemon zest
1/2 cup strained fresh lemon juice
icing sugar, for dusting

Method :
1. for the crust, melt butter in medium saucepan. remove from heat and stir in sugar, vanilla, and salt. add the flour and mix just until incorporated. press the dough evenly over the bottom of a lined 8-inch square pan. bake in a preheated oven of 180C for 25 to 30 minutes, or until the crust is well browned at the edges and lightly browned in center.

2. for the lemon topping, stir together the sugar and flour in a medium bowl until well mixed. whisk in the eggs. stir in the lemon zest and juice. when crust is ready, turn the oven down to 150C and pour in the filling. bake for 20-30 mins until topping is puffed at the edges and no longer jiggles in the center.

3.Set on a rack and cool completely in pan. when cool, transfer to cutting board and cut into 16 bars or desired size. 

4. sieve icing sugar over bars just before serving.
 
Verdict?
The crust is slightly crispy with buttery taste, nice but due to the leaking of topping thru the biscuit base, some parts are actually a bit too moist. The lemon topping is full of lemon flavour but is too sweet for me even I had reduced the sugar, need to reduce further. Although mine is considered a failure but still tasted quite good and dear brother actually like it, he finished most of the bar all by himself lol.

Fried Oyster Mushroom with Sweet Sauce

$
0
0

I had bookmarked this recipe for long time but have no chance to cook it since I seldom do the cooking. After long period of under use my kitchen during Sunday, recently we (my helper and myself) started to make use of of the kitchen again lol.


Recipe from  平平凡凡,简简单单.

Ingredients :
100g oyster mushroom (original is abalone mushroom)
1 egg
adequate flour
adequate white sesame seeds

Sauce :
3 tbsp tomato sauce / ketchup
1 tbsp sugar
1/4 tsp salt
3 tbsp water
a bit of dark soya sauce 

Method :
1. Mix oyster mushroom with egg then coat with flour and deep fry till golden brown. Dish out and drain the oil.
2. Dish out the oil and left a bit in the wok, pour in the sauce and cook till boil.
3. Add in fried oyster and cook until sauce become thicken.

Verdict?
This dish is really delicious, quite addictive and great to eat with rice. Dear husband and myself feel that the sauce is a bit too sweet and salty, will need to reduce the sugar and salt next time so that can be good to go without rice.

Apple Soft Pound Cake

$
0
0

I wanna bake a cake for one of my buddy to console her from failing her exam, and she requested for Apple Cranberries Olive cake. However I wanted to try this apple soft pound cake when 1st saw in Anncoo Journal and so I decided to bake it instead :P, totally no regrets at all! 


The cake was so soft, I was so afraid it will break into pieces when I wanted to transfer it from the removable cake pan to the plate so I was extra careful when doing the transfer. I took Ann's advise to chill the cake before slicing the cake. However the cake became a little hard after chilling over night, it will take awhile before the cake is soften so I will suggest to chill it for may be an hour before slicing.


Recipe adapted from Anncoo Journal.

Ingredients: for 10.5" bundt cake pan
220g butter (room temperature)
170g sugar
3 large eggs (about 210g, I used 4 small eggs) – separated
1 tsp vanilla extract
180g plain flour
30g corn flour
5g baking powder
250g Green apple, peeled and cubed and mix with 1 1/2 tbsp lemon juice (I used red apples since I need to clear stock)
Lemon zest from 1 large lemon

Method:
1.Spray Non-stick spray evenly in bundt pan or line two loaf pans and set aside.
2.  Cream butter and sugar till fluffy and pale then add vanilla extract, mix well.
3.  Add egg yolks into the batter one at a time and mix well before adding in another then slowly add in egg whites and mix well, stop machine.
4. Sift plain flour, corn flour and baking powder together and fold into butter mixture with a rubber spatula.
5.  Lastly pour in lemon zest and apple cubes, mix well.
6. Pour the batter into the prepared pan and place in the preheated oven at 180C (I used 170C for my oven) and bake for 35-40 mins or skewer comes out clean. (I baked for 35 mins) 
7. Leave pound cake to cool in pan for 30 mins and remove cake then place on to rack to cool completely.
8. Chill the cake before cut.

Verdict?
The cake is soft and moist, the crunchiness of the apples indeed given extra bites for the cake. The sweetness of the cake is just nice that you will feel like eating another slice. This cake received a lot of compliments, do give a try if you like apples in your cake.

Banana Streusel Snack Cake

$
0
0

I was extremely stressed during the last 2 weeks. Beside being busy with work, I was busy with domestic issue too. Well, this issue has been exist ever since my ex helper on board (ya ex helper who had went back home) 9 months ago. Her relationship with my in laws are not good, or rather should say is tense... both me and dear husband are being sandwich between them. They have been giving us hell of problems that sometimes affecting us and our work errr..... I think I better dun talk about it, if not will affect my blood pressure lol.


I may not be active in blogosphere during this period of time due to my busy schedule especially the "maidless" days.  Hope I am able to steal some of the times to update my blog and at the same time, do my favourite blog hopping.


Well back to my bake which I had baked before my pregnancy. Banana cake is always in my top flavourite list, thus when I first started to bake, the cake that I chose was this banana cake. This banana cake is so so good that I do not intend to try other recipe for long period. Well, mind will change sometimes, I decided I should give a try on other recipes which I might find another good banana cake that I like it too.

I baked this banana streusel snack cake was because of the streusel topping, not sure since when, I am in love with strusel topping :D.

Recipe from Technicolor Kitchen

Streusel :
60g all purpose flour
50g light brown sugar
42g unsalted butter, softened
¼ tsp ground cinnamon

Cake :
233g cake flour
1 tsp baking powder
½ tsp baking soda
½ tsp salt
255g mashed ripe bananas (2 medium or 3 small)
3 tbsp whole milk
1 tsp vanilla extract
113g unsalted butter, softened
150g light brown sugar
1 large egg, lightly beaten with a fork


Method :
1. Make the streusel: in a medium bowl, mix together the flour, sugar, butter and cinnamon with your fingertips until the mixture is lumpy; refrigerate.
2. Center a rack in the oven and preheat the oven to 180°C. Butter a 20cm (8") square pan then flour the pan, tapping out excess flour. Have all the ingredients in room temperature.
3. Sift together the flour, baking powder, baking soda and salt into a small bowl and set aside.
4. Put the mashed bananas in a medium bowl and stir in the milk and vanilla; set aside.
5. In the bowl of an electric mixer fitted with the paddle attachment beat together the butter and sugar on medium-low speed until fluffy, 2-3 minutes.
6. Add the egg and beat until completely incorporated.
7. Add the banana mixture (it will look curdled, but that’s OK) and beat until combined. Reduce the mixer to its lowest speed and gradually add the flour mixture, beating just until incorporated.
8. Spoon the batter into the prepared pan and smooth the surface with a rubber spatula. Sprinkle the streusel evenly over the batter.
9. Bake the cake until it springs back when gently pressed in the center and a round wooden toothpick inserted in the center comes out clean, 35 minutes. Transfer to a wire rack and let cool in the pan completely before cutting and serving.

Verdict?
The cake is light and soft, taste good with the buttery streusel topping. However I still prefer my all time favourite banana cake.

Dulce de Leche Chiffon Cake

$
0
0


My domestic helper had quit and went back home for a week and during this period, I am "maidless" and not sure will last for how long. I have actually got one transfer maid but she play me out last min and wanted to go back home. I am having headache of sourcing a helper, some heard that there is an Ah Ma (grandma) at home, immediately reject the offer :(.

I must really salute to those working mothers without domestic helper, I am so drain out even with the help of dear husband and in laws. Time is not sufficient for me as well, I didn't even manage to do much house chores and the weekend is just over, taking care of my little kicker really occupy most of the times. My day starts from 5am plus (wake up to pump milk, yes I am still breast feeding) and ends at 11pm plus (last pump of the day lol), I can't even have time to rest or take a nap, I guess I have to say bye bye to my baking temporary until my new helper on board, then I will be able to have times to visit my favourite blogs too.


Well, enough of pouring, now back to my baking. I have love-hate feeling for chiffon cake. I love to eat chiffon cake but I really hate to bake it, I do not know why I just cannot get 100% successful rate, this DLL chiffon cake had the same fate, failed again. I seriously thinking of taking up some classes on how to bake a chiffon cake :(.
Recipe modified from My Kitchen Snippets

Ingredients A: (for 7" cake pan)
4 egg yolks
90 gram Dulce De Leche

10g corn flour (I omitted cos dun have at home)
100 gram cake flour (I increased from 90g to 100g)
1/2 tsp baking powder
1/4 tsp salt
50 ml vegetable oil
50 ml milk

Ingredients B:
4 egg white
15 sugar
1/2 tsp cream of tartar

Method :
1.          Pre-heat the oven to 180C. Get ready a tube pan. Do not grease it.
2.          Sieve cake flour, corn flour, salt and baking powder. Set it aside. Combined the milk and oil together.
3.          In a mixing bowl mix the egg yolk and Dulce De Leche until well combined. Add in the milk and oil mixture. Mix well. Lastly add in the flour mixture. Mix until the mixture is smooth.
4.          In a mixer whisk all the ingredients B on high speed until soft peak.
5.          Fold in the egg white into the egg yolk mixture in 3 batches. Fold until well combined.
6.          Pour the cake into an ungreased tube pan and bake for 30 - 45 minutes or until skewer comes out clean when tested.

Verdict?
The taste of DDL is very mild but the cake is very soft, I think if I bake it successful, it will taste much more nicer.

Lightning McQueen Car Cake

$
0
0


I am cutting queue to post this cake up 1st, if not this cake can be posted only at least 2 months later since I still have quite a no. of back logs.

This cake was baked for my little kicker's birthday on 29 September 2012, yes his 1st birthday, times flies, my little baby is one year old now :).


When I decided to bake a cake for him, I have set my mind to make a car cake. Friends asked me why car cake? Why red color? Is it he likes car? Is it his favourite color is red? My replied was his mummy thinks that cars should be boys' favourite and his mummy not sure which is his favourite color but his mummy thinks that red car is very out-standing and nice lol.


Well, actually when mixing the coloring into whipping cream, I was kind of regretted. I should have chosen other colors e.g. blue, color, orange...etc instead of red. The amount of coloring that I used really scared me, I used 2 bottles of different red coloring and 1/2 bottle of pink coloring to achieve this red, I used wilton coloring. I did some research before I started on the mixing of coloring into whipping cream, here is what I did. Firstly, I added pink coloring into whipping cream, about 1/2 bottle to get dark pink, then I added christmas red and no taste red starting with 1 tsp each, I almost finished both the bottles. I let the colored whipping cream sits in the fridge overnight so that the color will get darken a bit.

 I think this will be the 1st and might be the last time I will make a RED color cake, I have to tell all my guests and specially kept reminding dear daughter and her friends not to eat the red cream at all. The red coloring became my nightmare, my hands were in red for a few days. My little kicker's hand was in red too cos he went to "snatch" the cake, he kept starring at his hand cos the red coloring stay on his hand even after washed a few times, he must be so curious why his hand change color hahaha...(I will share this photo in future :P).


There were a lot of hiccups here and there that nearly making me to give up on this cake, I had to bake the chocolate cake 3 times in order to get the right amount. I will not record down how much cakes I had wasted but share the sufficient amount of ingredients to make this car. I am not sure is it too much liquid in the whipping cream due to the large amount of coloring, the colored whipped cream is not as smooth and also a bit grainy I feel. The colored whipped cream also soften very fast in room temperature, I can only pipe for awhile and the whipped cream need to chill before I can continue, thus spent a lot of times on moving the cake and whipped cream in and out of the fridge.
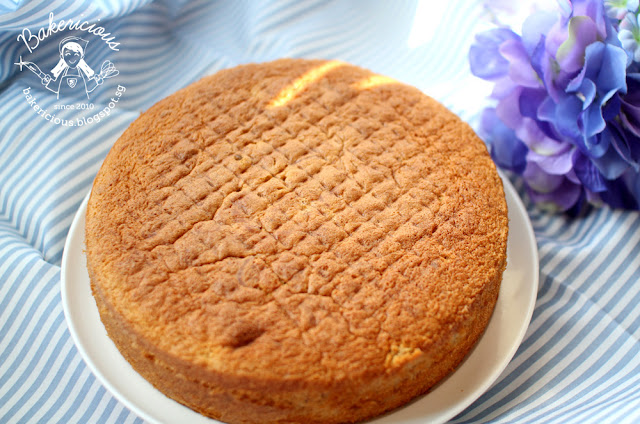

Ingredients:
Chocolate Cake : (for 2 trays of 9" x 11" cake pan)
8 egg white
8 egg yolks
300g sugar
160g cake flour
64g corn flour
4 1/4 tbsp cocoa powder
2 1/8 tsp baking powder
106g corn oil

Method:
1. Sift cake flour with cornflour, baking powder and cocoa powder.
2. Whisk egg white until soft peak forms and then add in sugar gradually and whisk till sugar dissolved and mixture is thick and glossy.
3. Drop in egg yolks, one at a time, making that it's evenly combined before the next addition.
4. Fold in 1/2 of flour mixture and mix well.
5. Pour in oil and mix well, fold in the balance flour mixture and mix till well combine.
6. Pour the mixture into round cake tin and bake in pre-heat oven at 175C for about 15-20 mins or till skewer inserted in the middle comes out clean.
7. Leave cake to cool on a wire rack.


White Gelatin Stabilized Whipped Cream : adapted from Evan's Rambling Kitchen
200g whipping cream

1 tbsp powdered sugar
1/2 tsp powdered gelatin


Method :

1. In a small saucepan, combine powdered sugar and gelatin. gradually stir in 1/4 cup of the cream. bring mixture to just a boil while stirring constantly. it will thicken slightly. scrape the mixture into a small bowl and allow to cool to room temp.
2. In a chilled mixing bowl, whip the rest of the cream just until traces of the beater marks begin to show. add the cooled gelatin mixture in a steady stream, beating constantly. whip until stiff and use immediately.

* I had left about one rice bowl of whipped cream.


Red Coloring Whipped Cream :
350g whipping cream
1 bottle wilton no taste red
1 bottle wilton christmas red
1/2 bottle wilton pink

1. Mix the pink coloring into whipping cream to get dark pink.
2. Mix 1 tsp of christmas red and no taste red alternately until achieve the red color you want.
3. Let the colored whipping cream sit in the fridge over night.
3. Whip the colored whipping cream until stiff and use immediately.

* I had left about one and half to two rice bowl of whipped cream


Chocolate Butter Cream : 
550g butter (soften)
60g sugar
300g melted chocolate
10 oreo cookies - crushed

Beat butter and icing sugar till light. Then pour in melted chocolate and mix till evenly mixed and pour in crushed oreo cookies.

*  The chocolate butter cream is more than enough, if you do not need a thick layer of chocolate butter cream filling, you can cut down to 350g - 400g of butter.


I didn't take photo on the step by step, you may refer to 温馨小屋
 
For assemble : 
1. Slice the 2 pcs of rectangle chocolate cakes into half and you will get total 4 pcs of cakes.
2. Stack up the 3 slices of cakes.
3. Slice the balance 1 pc of cake into 3 pcs and stack up, placed it on the center of the big stacked cake.
4. Trim the front and back of the small stacked cake in slant way to become front and back wind screen. 
5. Use one of the trimmed pc to place on the end of the big stacked cake to become spoiler.
6. Trim both front sides of the big stacked cake to become headlights.
7. Apply chocolate butter cream onto each layer of cakes.
8. Apply white whipped cream onto the whole cake.
9. Use the pipping tip no. 2 to pipe thin red lines for windows, front and back wind screen, headlights and car plate.
10. Use pipping tip no. 20 to pipe red whipped cream to fill up the whole cake except the windows, front and back wind screen, headlights and car plate.
11. Use 4 oreo cookies to become the 4 typres.
12. Use 2 chocolate chips and place on the front window screen to become the eyes.
13. Mix yellow coloring into the balance white whipped cream and piped on the car for the numbering and lightning logo. Pipe a small dot on the center of eyes (2 chocolate chips) too.
14. Keep the cake in the fridge until serving.

I didn't take photos on cake after slice, if you wish to know how is the internal looks like, you may refer to here.

Although is not easy to churn out this cake, although the cake is not perfect and there are a lot of flaws. But I felt so satisfied after the completion of the cake, especially when I took out the cake and can hear the non-stop "wow" from my guests heeheehee.. 

I must thank Felvin for sharing her how to make Lightning McQueen car, without her step by step guide, I dun think I am able to churn up this beautiful cake. Thanks again Felvin. 
Oh I must thank dear husband too, he also helped me a lot on decorating the cake, thanks dear!


Cookie Dough Cheesecake Bars

$
0
0

 I am at 3rd week of "maidless" days, so far still coping well. Although is exhausted but I am perfectly fine with physically tire comparing to the mentally stress that I had been thru for the past 9 months with the fights between mil and domestic helper. During that period, I was in mixed feeling, looking forward to go home after work and see my little kicker but at the same time, felt so stressed cos may need to listen to the complaints from mil or domestic helper or even both of them.

So at least I am free from these complaints now but of course, stress with sourcing domestic helper, is really not easy to get one now. Another helper threw in white tower when she was on the way to my place with the agent, she didn't even step into my house to meet us yet! The domestic helpers are more choosey and fussier than employers!


Another cut queue post, need to post this up 1st as I have received requests for recipe. Especially for my department gal since she is organising a birthday celebration for her boy, so she want to include this cookie dough cheesecake bar in her party menu.

I baked this for my little kicker's 1st birthday celebration, the dinner started at 5pm and I baked this only at 2pm plus while I was still rushing for the decoration of the Lightning McQueen car cake. Dear husband frowned when he saw me rushing like crazy woman, he said I should have forget about baking this and just focus on the birthday cake. As usual I turned a deaf ear lol, I just carried on with my baking.

Actually this cheesecake bar is really easy to prepare even though it looks like a lot of steps. I let it chilled for 1 hr before asking dear husband to slice into squares for me. When he was slicing, he was complaining that the digestive biscuit base was hard, the cheesecake and cookie portion was fragile, it will crack into pieces when slicing so he had to be extremely careful with the slicing. However I saw his expression changed when he put one small broken piece into his mouth, he said "wow, very very nice!" I told him "Luckily I never listen to you not to bake it!" Hahaha.....

Recipe adapted from Bisousatoi and My Baking Addiction, originated from The Essential Chocolate Chip Cookbook.

Ingredients :
Crust :
1 1/2 cups digestive biscuits (crushed)
5 tbsp or 70g unsalted butter, melted

Chocolate Chip Cookie Dough :

5 tbsp (70g) salted butter, room temperature (I used salted butter)
1/3 cup (65g) packed light brown sugar (I cut down to 55g)

3 tbsp granulated sugar
1/4 tsp salt (I omit since used salted butter)
1 tsp pure vanilla extract (I used 1/2 tsp vanilla powder)
3/4 cup (85g) flour
1 cup chocolate chips
 

Cheesecake Filling :
10 oz (285g) cream cheese, room temperature
1/4 cup (55g) sugar
1 large egg, room temperature
1 tspn pure vanilla extract
(I used 1/2 tsp vanilla powder)

Methods :
1. Preheat the oven to 160C. Line an 8 inch square baking pan with parchment paper or foil allowing a little overhang and grease the pan. Set aside. (As I am using removable base baking pan so I didn't line the baking paper)


2. Mix the melted butter and digestive biscuit crumbs until thoroughly combined. Press the mixture into the bottom of the prepared pan. Bake in preheated oven for 6 minutes. Remove pan to a cooling rack. Do not turn your oven off.

3. While the crust is cooling, prepare the chocolate chip cookie dough. In the bowl of a stand mixer fitted with the paddle attachment or in a large bowl with an electric mixer, beat butter, brown sugar, granulated sugar, salt and vanilla until smooth and thoroughly combined, about 1 minute. Mix in the flour on low speed, and mix until just incorporated. Mix in the chocolate chips. Set aside.

4. In the bowl of a stand mixer fitted with the paddle attachment or in a large bowl with an electric mixer cream together the cream cheese and sugar until smooth. Mix in the egg and vanilla on low speed just until incorporated. Pour the cheesecake batter into the prepared crust. Using your hand to form clumps. Flatten the clumps of dough in your palms to flatten them out a bit. Distribute the cookie dough onto the top of the cheesecake batter. Be sure to use all of the dough. You will cover most of the cheesecake batter.

5. Bake for about 30 minutes, until the top feels dry and firm (the cookie dough) and the entire pan looks set if given a gentle shake. Move bars to a cooling rack and allow to cool completely.

6. Lift the bars out by the overhang; slice into desired size and store in the refrigerator. Serve cold or at room temperature


Verdict?
The married of digestive biscuit base and cheesecake and cookie dough are perfectly match. The crunchy digestive biscuit with creamy cheesecake plus the buttery, chocolaty cookies dough, really taste heavenly. This bar is highly addictive, I promised you will not be able to stop at just one piece! I received so much compliments during the party, I have guests who were so full but still forced themselves to squeeze in another piece, and one more piece and the last piece (hahahah...funny right) cos is just simply too delicious. I baked 3 times in total, to share with my colleagues and also dear husband that had requested for his colleagues too. During the distribution of the bars, my sales directors were actually on the way to attend meeting but they turned back to ask for 2nd serving lol. Everyone given thumbs up.


Banana Sponge Cake

$
0
0

Hurray! After a long period of waiting, I am finally out from "maidless" day! So glad that at least I have some leisure times rather than busy all the way.

I cannot make any comment on this helper too early but so far so good, at least she is obedient type so my mil is happy with her. And she has more patience with the kids so I won't get to hear any high pitch voice like my previous helper. Most importantly, I am happy and stress-free to be at home all time since I won't get to hear any complaints and fights :D.

I didn't bake for a month plus, getting lazy after stop for a period lol. I have many backlog to clear and I wish to post some of the food that prepared for my little kicker birthday party but lazy to clean up the photos hahaha...


This cake was baked a few months ago when I had too many bananas sitting in my freezer (the bananas are accumulating again lol), so I decided to bake a banana cake. Well, although my heart was ready to go for my all time favourite banana cake but my mind telling me that I should give other recipe a try.

I first saw this banana sponge cake was when Wen submitted to Aspiring Baker : Fruity March 2011 hosted by me. As during that period, I was still glued tightly to my all time favourite, so didn't pay much attention on this recipe. When I decided to try other banana cake recipe and this recipe immediately caught my attention. Beside this is Wen's all time favourite, and also the 2 bloggers that I admire, HHB and Sonia given good review on it.


Recipe adapted from here which originated from Richard Goh Baking Class Stage 1.

Ingredients:
3 eggs (medium)
130g sugar
200g banana (ripe & cut into small pcs)
150g cake flour
1/2 tsp baking powder
1/4 tsp baking soda
100g vegetable oil
1/8 tsp vanilla extract

Method :
1. Preheat oven to 160 degree C.
2. Grease and line a 8" round tin with paper.
3. Sieve flour, baking powder and soda together. Sieve twice and set aside.
4. Whisk eggs, sugar and banana at max. speed till stiff/ribbon stage. (For Kenwood Chef - approx 10-13mins)
5. Fold in flour and mix well. (Can use spatular or hand to mix)
6. Add in oil and mix well till batter is shiny and flowing.
7. Bake for 40 - 45mins

Verdict?
The cake is soft and spongy, much lighter than butter cake. If you are looking for a lighter and healthier version of banana cake, this is the recipe for you. I will definitely bake again if I want a lighter banana cake. Although dear husband and brother think the cake is nice but they still prefer this banana cake, well they have "heavy" taste bud lol.

Steamed Rainbow Cake

$
0
0
 
There are quite a no. of us are excited today, we are having our 1st PLP (portluck party) in our office. I initiated this event and got one of my department gal to organise it, invitation opened to our division and glad that most of them are participating, except those who are on leave or out-station. I saw a lot of food on the table when I reached office this morning, can't wait for the lunch time heeheehee... Hope able to share the photos with you soon :P.


This cake is not for the PLP, I didnt bake for this event, I cooked fried mee hoon instead. This cake was done many months ago, the 1st steamed cake that I had made, before steamed moist chocolate cake.

As I have mentioned before, I love rainbow cake. I just can't take my eyes of on colorful bakes, it just will brighten me up. Occasionally, I will google to search for rainbow cake and this steamed rainbow cake was found during one of the net surfing. It was kept in my recipe collection for longest time and was been noticed again recently when I was hunting for some inspiration.


I am submitting this post to Aspiring Bakers #25: Steaming Hot Cakes (Nov 2012), hosted by Miss B of Everybody Eats Well in Flanders.
 
Recipe from Aunty Yochana.

Ingredients:
6 eggs
250g superfine sugar
2 tsp. vanilla essence or 1/2 tsp. vanilla bean
280 gm. cake flour - sifted
1/4 tsp. salt
200 ml. coconut milk
3 drops of green colouring
3 drops of red colouring
3 drops of yellow colouring

Method :
1.          Prepare steamer and a 8" round tin.
2.          Whisk eggs with sugar and vanilla until mixture is thick and pale in colour.
3.          Using spatula, fold in flour, salt and coconut milk in small amounts till well mixed.
4.          Divide mixture into 3 equal parts. Stir in red colouring into one part, green into one part and yellow colouring into the 3rd part.
5.          Pour 1 ladle of green colouring mixture into tin and steam for 5 - 10 mins. Repeat with red mixture, followed by yellow mixture till mixture is used up.
6.          Steam cake for another 15 - 20 mins or until a skewer inserted into the centre of cake comes out clean. Remove cake to a wire rack and leave to cool before unmoulding it. Serve. 
 
Note:
1.          What I did was to divide each colour mixture into 2 equal part to make it 6 layers, each layer steam for 5 mins, except the last layer I steamed for 20 mins. The batter weighs about 1kg, you may divide the batter according to the number of colours/layers you want to achieve.
2.          Bang the batter on tabletop before steaming to release any big bubbles.
3.          The colour of the batter is what you get after steaming, so adjust the colouring according to your own liking.  

Verdict?
I must have over steamed the cake, the cake was a bit dry and I can't really taste the coconut at all. However, the cake tasted so much better the next day.

Cempedak Butter Cake

$
0
0


For the past few nights, there was very nice baking aroma came from my neighbours, must be Indian neighbours baking for their Deepavali. It smell so nice that made me miss my baking, although I have the urge of baking but I am too tire and of course, too lazy to take any action hahaha....


This cake was baked on August 2012. I am a big fan of jackfruits but not cempedak, even if I see cempedak in supermarket or fruits store, I seldom have the urge of purchasing it. However when I saw this cempedak butter cake and the rave from鲸鱼蓝蓝蓝, I decided that should give it a try.


I remember I saw cempedak in the supermarket quite a few times but when I wanna buy, I can't locate any :(. Thus, this recipe was shelved it for quite awhile until I saw a few packs of cempedak at my mum's place that bought by my sis! I quickly "snatched" 2 packs from her hahaha...


Recipe adapted from here.

Ingredients : (for 7" square cake pan)

225g butter
90g castor sugar
4 eggs
240g cake flour
1/2 tsp baking powder
4 tbsp milk
110g cempedak meat (mashed)

Method :
1. Beat butter and caster sugar until light and fluffy
2. Add in egg, one at a time, beating thoroughly after each addition.
3. Fold in sifted flour, using spactula.
4. Add in milk and cempedak meat, mix well.
5. Pour the batter into the cake pan and bake in pre-heated oven at 180C for 35-45 mins or skewer comes out clean.


Verdict?
The cake is very moist and tender, strong aroma in smell but tasted not as strong.

Nutella Cake

$
0
0


 Did I ever mention that I am an nutella craze? I can hug a big tub of nutella and gulp down non stop using a spoon while watching TV drama or reading books. I quit this bad habit many years ago ever since I need to watch my waistline. 


However during my maternity leaves at home, this bad habit came back and haunt me. I picked it up again and within 3 days, I can finished the giant tub of nutella which I think is 750g, scary right! Of course I dun do it anymore, I cannot afford to load more fats on me  hahaha...


Since I still have 2 big tub of nutella at home, I am looking for some recipes to get rid of it. Recalled that I ever saw this recipe in one of my baking books collection, quickly flipped through all the books to hunt for it lol. This cake was baked almost 1/2 year ago, I still have 1 tube unopened nutella and 1/3 tube opened one in the fridge now, need to find chances to get rid of it.


Recipe from Agnes Chang I CAN BAKE

Ingredients: (for 9"/22cm round cake pan but I used 8" and a few cupcakes)
250g butter, softened
200g soft brown sugar
4 eggs, lightly beaten
300g self raising flour, sifted
5 tbsp milk

6tbsp or more Nutella chocolate hazelnut spread
60g hazelnuts, chopped coarsely (I used walnuts)

Method:
1.Put all the ingredients for cake into a mixing bowl and beat until light and fluffy.
2.Pour 2/3 portion of the cake mixture into a greased and lined round baking tin and spread evenly to level. 
Spoon the Nutella chocolate hazelnut spread in six blobs (I put more).
3.Top with the remaining 1/3 portion of the cake mixture, swirl a few times with a skewer, then smooth the top.
4.Sprinkle chopped hazelnuts (I used walnuts since dun ve hazelnuts on hand) on top of batter and bake in a preheated oven at 180C forabout 45minutes to 1 hour or until cooked and golden brown. (Pls cover the cake with aluminium foil if the cake starts to brown too fast)
5.Remove, leave to cool before serve.

Verdict?
The cake is soft and fluffy, tasted so good with the nutella. This is so easy to whip up that you can have it 
anytime when you are craving for butter cake.


Viewing all 334 articles
Browse latest View live


Latest Images